

Pour Over Coffee Extraction: A Step-by-Step Guide
Table of Contents
- Understanding Pour Over Coffee Extraction
- Getting the Pour-Over Coffee Ratio Right
- Selecting the Right Pour-Over Coffee Grind Size
- Mastering Pour-Over Coffee Water Temperature
- The Bloom: Why It Matters and How to Do It Right
- Pouring Technique and Saturation for Better Extraction
- Pour-Over Coffee Troubleshooting: Diagnosing and Fixing Common Problems
- Frequently Asked Questions
Last Updated: October 13, 2026
Understanding Pour Over Coffee Extraction
Pour over coffee extraction is the process of dissolving soluble compounds from ground coffee using hot water. The goal is to pull the right amount of flavor, sweetness, and body while avoiding bitterness or sourness, the balance that transforms a flat cup into something genuinely delicious.
Extraction happens through contact time and water temperature. Hot water breaks down coffee cell walls and releases oils, acids, and sugars. Too little contact time leaves the coffee weak and sour; too much pulls out harsh, bitter compounds. The sweet spot sits in the middle.
Customers sometimes struggle with this exact problem. They buy excellent single-origin beans, like our Ethiopia Natural with its milk chocolate and fruity notes, but their technique doesn't match the bean quality, wasted coffee and disappointment.

The good news: extraction isn't magic. It's measurable and controllable. Change one variable at a time, taste, and adjust, within a few brews you'll dial in something genuinely good.
Getting the Pour-Over Coffee Ratio Right
The coffee-to-water ratio is your foundation. Get this wrong and no amount of technique fixes the result. The standard starting point is 1 gram of coffee to 16 grams of water. That's a 1:16 ratio, and it works as a reliable baseline for most beans and drippers.
To use this ratio, weigh your coffee and water: 25 grams of coffee means 400 grams of water; 30 grams means 480 grams. A simple kitchen scale removes the guesswork.
The ratio directly controls strength. A tighter ratio (more coffee, like 1:15) gives a heavier body and bolder taste; a looser ratio (more water, like 1:17) produces clarity and brightness.
Start with 1:16 for at least three brews. Too weak? Move to 1:15. Too strong? Try 1:17. Small adjustments reveal your actual preference, which should guide your ratio, not generic advice.
Selecting the Right Pour-Over Coffee Grind Size
Grind size controls how fast water moves through the coffee bed: finer grinds slow it down, coarser grinds speed it up. This matters because contact time depends partly on flow rate.
For pour-over coffee, aim for a medium-fine grind, between sand and table salt in texture, slightly gritty, not powdery. This works with most drippers and leaves room to adjust brew time without extreme changes.
Grinding too coarse makes water rush through, dropping contact time and leaving the coffee sour and thin. Too fine creates the opposite problem: slow flow, stretched contact time, and building bitterness.
The real issue is grinder consistency. A burr grinder produces uniform particles; a blade grinder creates a chaotic mix of powder and chunks. Even if the size looks right, inconsistency means some particles over-extract while others under-extract, and the cup tastes muddy and unbalanced.
If you're serious about extraction, a burr grinder is the single best investment you can make. It changes everything.
Mastering Pour-Over Coffee Water Temperature
Water temperature drives extraction speed: hotter water pulls compounds faster, cooler water slower. The standard recommendation is 195-205°F, hot enough to extract efficiently, cool enough to avoid over-extraction.
Let water boil, then wait 30 seconds before pouring. This simple step brings the temperature into the ideal range without a thermometer. If you have a thermometer, even better, aim for 200°F as your target.
Temperature affects flavor noticeably. Water above 210°F pulls bitter compounds aggressively, tasting harsh and burnt. Water below 190°F extracts slowly, tasting weak and sour no matter how long you wait.
Different beans sometimes prefer different temperatures. A light roast often shines at 205°F. A darker roast might taste better at 200°F. Once you've nailed your ratio and grind size, temperature becomes your fine-tuning tool.
The Bloom: Why It Matters and How to Do It Right
The bloom is the first 30-45 seconds of brewing: pour just enough water to saturate the grounds, then pause while carbon dioxide escapes and water begins dissolving soluble compounds.
Skipping the bloom is a common mistake. Without it, the first water through the grounds carries less dissolved coffee, extraction becomes uneven, and the cup tastes thinner than it should.
To bloom properly:
- Pour water until the grounds are wet but not submerged
- Use about twice the weight of water as coffee (if you're brewing 25 grams, use roughly 50 grams of water)
- Wait 30-45 seconds
- Then continue pouring as normal
Watch the grounds during the bloom: they should bubble slightly as gas escapes. This visible degassing tells you the bloom is working, and when you resume pouring, extraction will be more even and flavor more balanced.
The bloom matters more with fresh coffee: beans roasted within the last week release gas aggressively, older beans less. Fresh, roasted-to-order coffee from Gospel and Grind offers maximum flavor and aroma.
Pouring Technique and Saturation for Better Extraction
How you pour shapes extraction by controlling two things at once: how evenly water contacts the coffee bed, and how much agitation the bed receives.
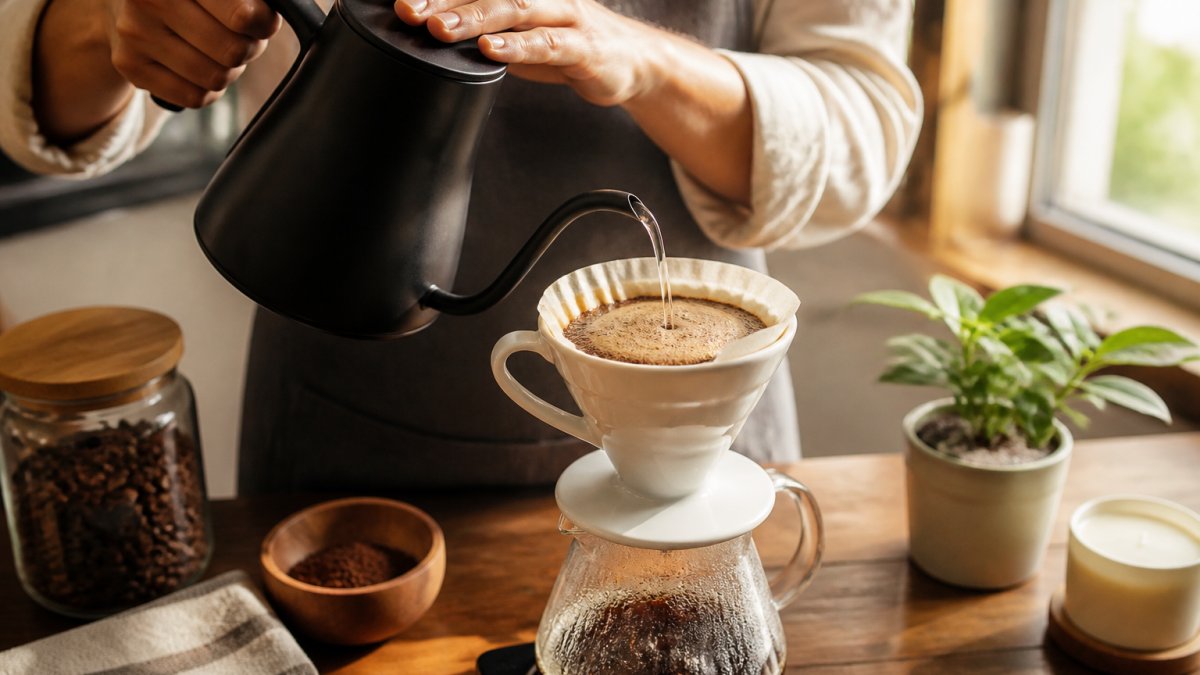
Why channeling happens. Coffee grounds swell as they absorb water. If the bed is uneven, a crater in the middle, a high spot on one side, water pools where the bed is lowest and pushes through the weakest point.
Pour rate and bed depth. A slow, steady pour keeps the water level low and the bed shallow; a fast pour raises the water level, increases pressure above the bed, and can disturb it.
Pour pattern. A spiral from the center outward, then back in, keeps the bed level and saturates the edges where dry grounds collect. Pouring only in the center digs a crater; pouring only around the rim leaves the center dry.
Agitation: useful in small doses. A gentle swirl or single stir evens out the bed and breaks up dry pockets.
Adapting technique to your dripper and filter. Dripper geometry and filter material change the best pour approach:
- Cone drippers with a large single hole drain fast and reward a slower, more controlled pour. A fast pour here tends to channel.
- Flat-bottom drippers hold the bed more evenly and tolerate a slightly faster pour, but they need a level bed to work as designed.
- Paper filters trap more fines and oils, giving a cleaner cup but a slower drawdown. If drawdown stalls, the issue is often fines, not your pour.
- Metal or cloth filters let more fines and oils through, producing a heavier body and a faster drawdown. Expect to adjust grind slightly coarser to avoid muddiness.
Reading the bed after the brew. A well-extracted bed looks flat and level, with grounds clinging evenly to the filter wall.
The goal is even saturation: every particle should spend roughly the same time in contact with hot water. When saturation is even, the cup tastes balanced and brew time becomes repeatable, which is what makes every other adjustment in this guide work.
Pour-Over Coffee Troubleshooting: Diagnosing and Fixing Common Problems
Most pour-over guides hand you a list of fixes. That fails because two different problems can produce the same taste, and changing three variables at once tells you nothing. A better method is diagnostic: read the cup and brew behavior, form one hypothesis, change one variable, and brew again.
Record three data points for every brew: dose in grams, total water in grams, and total brew time from first pour to drawdown finish. A kitchen scale and timer give you both. With those numbers plus taste, you can separate strength problems from extraction problems, not the same thing.
Strength vs. extraction: the distinction that fixes most confusion. Strength is how much dissolved coffee is in the cup; extraction is how much of the coffee's soluble material was pulled from the grounds. A cup can be strong and under-extracted (heavy body, sour edge) or weak and over-extracted (thin body, bitter finish). Adjusting only ratio treats strength when the issue may be extraction.
A refractometer, used by many specialty cafés, measures total dissolved solids (TDS) in the cup. Combined with your brew ratio, TDS lets you calculate extraction yield, the percentage of coffee mass that ended up in the cup. You don't need one to improve, but it turns guesswork into measurement.
A diagnostic sequence you can run in five brews.
-
Brew your baseline. Keep ratio, grind, temperature, and pour schedule fixed. Record dose, water, and total time. Taste and write down the dominant flavor.
-
Classify the problem. Sour, thin, and weak usually points to under-extraction. Bitter, harsh, and drying points to over-extraction. Muddy or inconsistent sips points to uneven saturation or channeling. Weak despite a tight ratio points to a grind or temperature issue, not a ratio issue.
-
Check drawdown time against your baseline. If the same recipe suddenly runs much slower, the likely cause is a finer grind, more fines, or a clogged filter. If it runs much faster, the grind is likely too coarse or the bed is channeling.
-
Change exactly one variable. For under-extraction, go finer on the grind first, it is the highest-leverage change. For over-extraction, go coarser. For uneven flavor, change pour technique or add a gentle swirl rather than touching the grind.
-
Brew again and compare. If the cup moved in the right direction, keep going in small steps. If it did not, revert that change and test the next hypothesis. One variable per brew is the only way to know what caused the difference.
Matching symptoms to likely causes.
- Sour and thin, fast drawdown: grind too coarse. Go finer in small steps.
- Sour and thin, normal drawdown: water too cool or bloom too short. Raise temperature toward 205°F or extend the bloom.
- Bitter and harsh, slow drawdown: grind too fine or too many fines. Go coarser and check your grinder.
- Bitter and harsh, normal drawdown: water too hot or brew time too long. Lower temperature or pour faster.
- Weak despite a tight ratio: grind too coarse for the dose, or water too cool. Check both, one at a time.
- Strong and bitter despite a good ratio: grind too fine. Coarsen and re-taste.
- Some sips good, some off: channeling or uneven saturation. Slow the pour, use a spiral pattern, and swirl gently mid-brew.
- Muddy, flat cup with slow finish: excess fines from an inconsistent grinder. See the grinder note in the grind section.
Change one variable at a time. Brew, taste, record, adjust. Within five or six brews you'll understand how your dripper, grinder, and beans interact, and fix a bad cup on purpose instead of by accident.
Frequently Asked Questions
What is the ideal coffee-to-water ratio for pour over coffee?
The standard pour-over coffee ratio is 1:16 (one part coffee to 16 parts water by weight). For example, 25 grams of ground coffee with 400 grams of water produces a balanced cup. You can adjust this to 1:15 for stronger coffee or 1:17 for lighter, more delicate flavors. Weighing your ingredients ensures consistency and helps you dial in extraction precisely.
Why does my pour-over coffee taste weak or sour?
Weak, sour coffee signals under-extraction, your water isn't pulling enough flavor from the grounds. Common causes include a grind that's too coarse, water temperature below 195°F, or a bloom time that's too short. Try using a finer grind, increasing water temperature to 200-205°F, and blooming for 45 seconds. If sourness persists, extend your total brew time by pouring more slowly to increase contact time between water and grounds.
What water temperature should I use for pour over coffee?
Brew your pour-over coffee with water between 195-205°F. Water hotter than 205°F can over-extract and create bitter flavors, while cooler water under-extracts and tastes sour or weak. If you don't have a thermometer, let boiled water cool for about 30 seconds before pouring. Temperature consistency matters as much as the exact number, maintaining steady heat throughout the brew improves extraction yield and flavor clarity.
How do I know if my pour-over coffee is properly extracted?
A properly extracted cup tastes balanced, neither sour nor bitter, with clear flavor notes. If you're tasting single-origin beans like Ethiopia Natural or Tanzania, you should detect the intended tasting profile (fruity, floral, or chocolate notes). Brew time typically ranges from 3-4 minutes. If your coffee tastes off, adjust one variable at a time: grind size, water temperature, or bloom time. Track which changes improve the flavor so you can dial in your technique.